Mockups
The product photos customers design on, with the print area and the real print size for each side.
A mockup is a product photo per printable side, the print area drawn on each photo, and the real print size in centimetres. Every product with the designer uses a mockup; the designer, the print files and the cart previews all follow it.
PrintBlob creates a T-shirt mockup when you activate it, with front and back print areas of 28 × 36 cm and 28 × 39 cm.
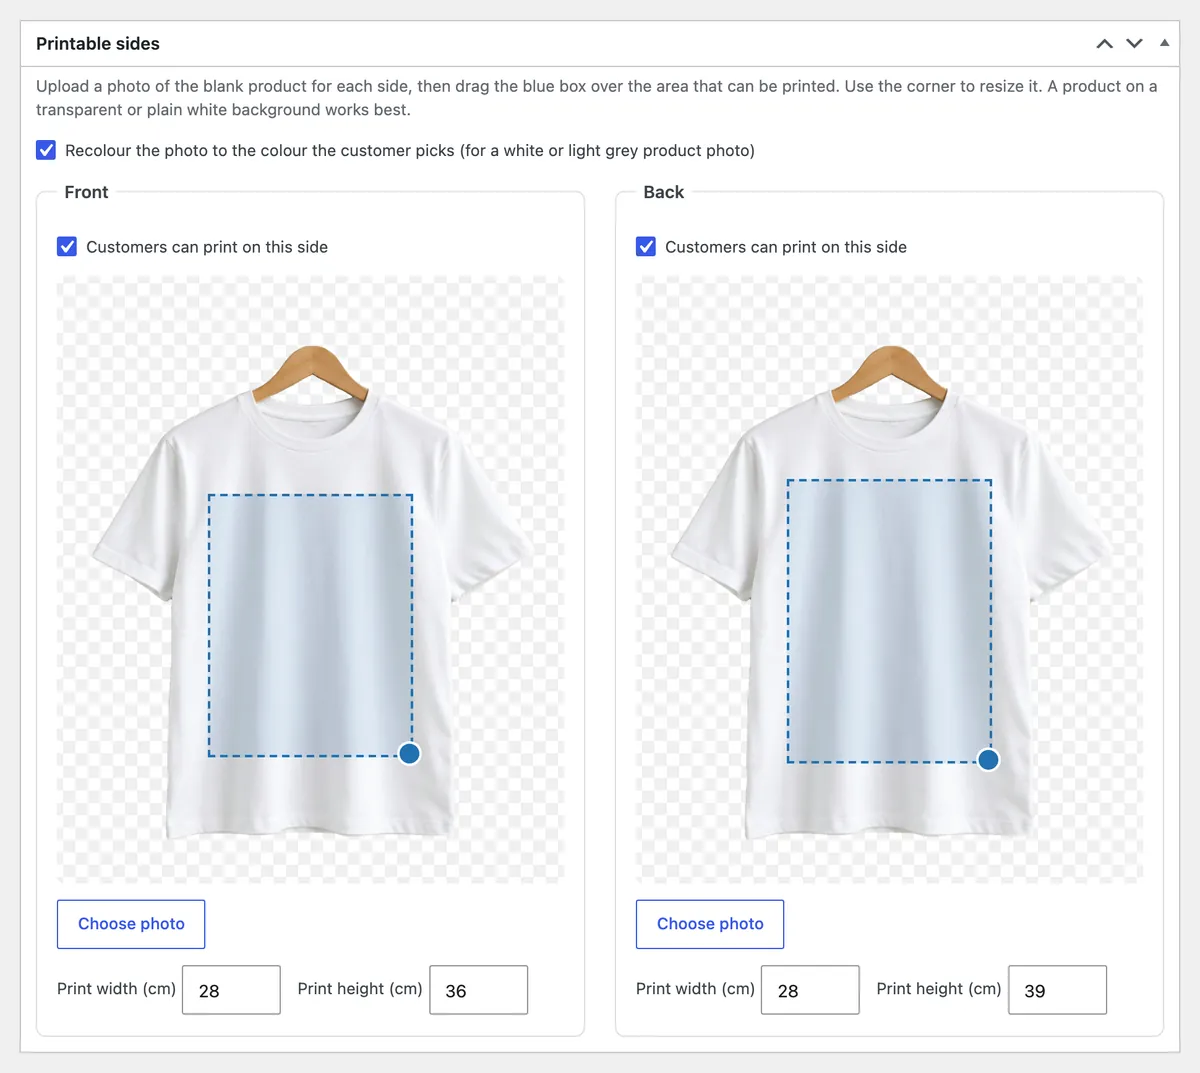
Set up a mockup
- Open Products › Mockups and select Add mockup (or edit the T-shirt).
- For each side, tick Customers can print on this side and select Choose photo.
- Drag the blue box over the area that can be printed. Use its corner to resize it.
- Enter Print width (cm) and Print height (cm): the physical size the print area represents.
- Tick Recolour the photo to the colour the customer picks if the photo is of a white or light grey product.
- Select Update.
Photos that work well
- A product on a transparent or plain white background.
- The same framing and size for every side.
- For recolouring: a white or light grey product, photographed evenly lit. Folds and shading are kept when PrintBlob recolours it.
Print files
When a customer adds a design to the cart, the browser renders each printed side as a transparent PNG at exactly the print size, at 300 DPI. A 28 × 36 cm print area gives a file of 3307 × 4252 pixels. Changing a mockup’s print size only affects new designs.
PrintBlob Pro adds Left sleeve and Right sleeve sides to mockups; see PrintBlob Pro.